Next.js and Rust: An Innovative Approach to Full-Stack Development
Let's build a full-stack app with authentication using Next.js and Rust!

Recently, shuttle released a Node.js CLI package that allows you to quickly bootstrap an application that uses a Next.js frontend with a Rust backend that uses Axum, a popular Rust web framework with easy-to-use, uncomplicated syntax.
The app we'll be building will be a notes app with a login portal that can register users, as well as log in users and reset passwords and logged in users will be able to view, create, update and delete notes. This article will focus more on the Rust (backend) side and will assume that you have knowledge of using React.js/Next.js for your frontend.

The repo containing all the code can be found here.
Getting Started
We can simply get started by running the following command (note: Looking to bootstrap your frontend so you can focus on the backend? Feel free to skip to the frontend section):
npx create-shuttle-app --ts
Once you press enter, it should ask you for a name - feel free to enter any name you want here, and then it should start installing Rust automatically for you and bootstrap an application that uses Next.js (with Typescript because of the additional flag) as well as Rust for the backend, along with relevant npm commands to allow us to quickly get started with developing both the back and frontend. The framework we will be using for the backend is Axum, which is a highly performant, flexible framework with simple syntax and is highly compatible with tower_http, which is another extremely strong library for creating middleware.
shuttle is a cloud development platform that simplifies the deployment of your apps. What makes it stand out is its "infrastructure-from-code" approach, allowing you to define your infrastructure directly in your code without the need for complicated consoles or external yaml/config files. This approach not only improves the clarity of your code but also provides compile-time assurance that you'll get what you asked for. Need a Postgres instance? Just add an annotation and you're good to go. shuttle also supports secrets (environment variables), static file folders and state persistence.
Next, we'll want to install sqlx-cli which is a great command line app for managing our database migrations. We can install this by simply running the following command:
cargo install sqlx-cli
If we navigate to our backend directory in the project folder, we'll be able to create our database migrations by using sqlx migrate add schema which will add a migrations folder (if you don't have one already) with a file that follows the naming convention of <timestamp>_schema.sql because we named our migration "schema".
This SQL file should have the following:
-- backend/migrations/<timestamp>_schema.sql
DROP TABLE IF EXISTS sessions;

CREATE TABLE IF NOT EXISTS users (
    id SERIAL PRIMARY KEY,
    username VARCHAR UNIQUE NOT NULL,
    email VARCHAR UNIQUE NOT NULL,
    password VARCHAR NOT NULL,
    createdAt TIMESTAMP WITH TIME ZONE DEFAULT CURRENT_TIMESTAMP
);

CREATE TABLE IF NOT EXISTS notes (
    id SERIAL PRIMARY KEY,
    message VARCHAR NOT NULL,
    owner VARCHAR NOT NULL,
    createdAt TIMESTAMP WITH TIME ZONE DEFAULT CURRENT_TIMESTAMP
);

INSERT INTO notes (message, owner) VALUES ('Hello world!', 'user');

CREATE TABLE IF NOT EXISTS sessions (
    id SERIAL PRIMARY KEY,
    session_id VARCHAR NOT NULL UNIQUE,
    user_id INT NOT NULL UNIQUE
);
As a side note, we'll be running these migrations automatically but if you want to run them manually, you can use sqlx migrate run --database-url <database-url>. The reason why we can do this is that we've set up our SQL file to be idempotent - this simply means that if the table already exists, we won't attempt to create it again. We drop the sessions table to force users to log back in once the app re-uploads as their cookies won't work.
Now that we're set up, let's get started!
Frontend
For this app, we'll need several pages:
Pages for logging in and registering
A page for users to be able to reset forgotten passwords
A dashboard page to show records
Pages for editing and creating new records
You can clone the frontend-only example for this article by cloning it like below (note: If you skipped straight to this section, you'll need to make sure you have Rust, cargo-shuttle and sqlx-cli installed and create the migrations from the previous section):
git clone https://github.com/joshua-mo-143/nodeshuttle-example-frontend
The cloned repository will have an already pre-setup src directory that looks like this:
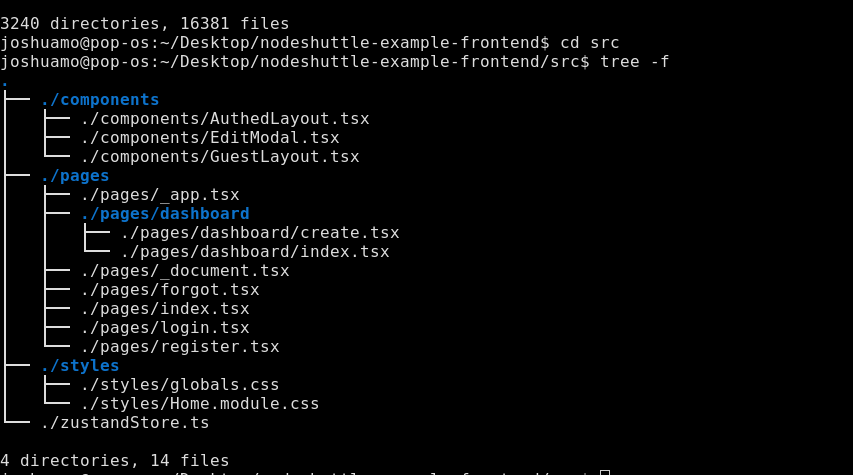
The components folder contains two layout components that we nest our page components inside of and a modal for editing records that we use in the Dashboard index page. The pages folder includes the relevant page components we'll be using in our app (where the file name indicates the route).
We use TailwindCSS for the CSS, as well as using Zustand for easy, bare-bones state management that doesn't require much boilerplate.
When the user logs in, they should see something like this if there are any messages:
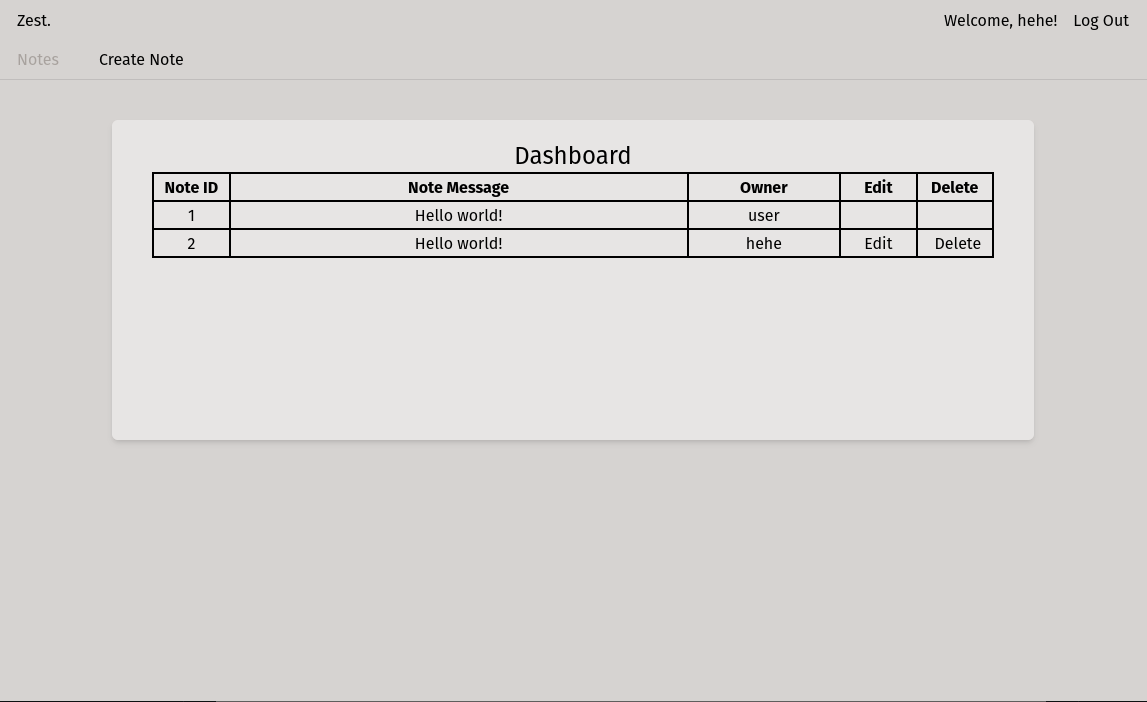
Once we build the backend, the user will be able to register, log in (using cookie session-based authentication) and view, create, edit and delete their own messages by using the frontend. Users will also be able to reset their password if they've forgotten it by entering their email.
Looking to make your own frontend? Feel free to consult the GitHub repo to check how the API calling and state management is set up.
Now that we're done with this part, we can move on to writing the backend!
Backend
If you navigate to the backend folder, you should see a single file called main.rs with a function in it that creates a basic router with one function that returns "Hello, world!". We'll be using this file as the entry point for our application and then creating other files that we'll import call in our main function.
You'll want to make sure you have the following contents in your Cargo.toml file:
# Cargo.toml
[package]
name = "static-next-server"
version = "0.1.0"
edition = "2021"
publish = false

[dependencies]
# the rust framework we will be using - https://github.com/tokio-rs/axum/
axum = "0.6.1"
# extra functionality for Axum https://github.com/tokio-rs/axum/
axum-extra = { version = "0.4.2", features = ["spa", "cookie-private"] }
# encryption hashing for passwords - https://github.com/Keats/rust-bcrypt
bcrypt = "0.13.0"
# used for writing the CORS layer - https://github.com/hyperium/http
http = "0.2.9"
# send emails over SMTP - https://github.com/lettre/lettre
lettre = "0.10.3"
# random number generator (for creating a session id) - https://github.com/rust-random/rand
rand = "0.8.5"
# used to be able to deserialize structs from JSON - https://github.com/serde-rs/serde
serde = { version = "1.0.152", features = ["derive"] }
# environment variables on shuttle
shuttle-secrets = "0.12.0"
# the service wrapper for shuttle
shuttle-runtime = "0.12.0"
# allow us to use axum with shuttle
shuttle-axum = "0.12.0"
# this is what we use to get a shuttle-provisioned database
shuttle-shared-db = { version = "0.12.0", features = ["postgres"] }
# shuttle static folder support
shuttle-static-folder = "0.12.0"
# we use this to query and connect to a database - https://github.com/launchbadge/sqlx/
sqlx = { version = "0.6.2", features = ["runtime-tokio-native-tls", "postgres"] }
# middleware for axum router - https://github.com/tower-rs/tower-http
tower-http = { version = "0.4.0", features = ["cors"] }
# pre-req for using shuttle runtime
tokio = "1.26.0"
# get a time variable for setting cookie max age
time = "0.3.20"
Once we're done with this, we will want to set up our main function so that we can use the shuttle_shared_db and shuttle_secrets crates to get a free shuttle-provisioned database and be able to use secrets, like so (as well as setting up a crude implementation of cookie-based session storage):
// main.rs
 #[derive(Clone)]
pub struct AppState {
    postgres: PgPool,
    key: Key
}

impl FromRef<AppState> for Key {
    fn from_ref(state: &AppState) -> Self {
        state.key.clone()
    }
}

#[shuttle_runtime::main]
async fn axum(
    #[shuttle_static_folder::StaticFolder] static_folder: PathBuf,
    #[shuttle_shared_db::Postgres] postgres: PgPool,
    #[shuttle_secrets::Secrets] secrets: SecretStore,
) -> shuttle_axum::ShuttleAxum {
    sqlx::migrate!().run(&postgres).await;

    let state = AppState {
        postgres,
        key: Key::generate()
    };

    let router = create_router(static_folder, state);

    Ok(router.into())
}
Now we can start creating our router! Let's make a file called router.rs in the src folder of our backend directory. We will put the bulk of our router code in here and then import the function we'll be using to make the final router into our main file once we're ready.
Let's open up our router.rs file and create a function that returns a router with routes for registering and logging in:
// router.rs

// typed request body for logging in - Deserialize is enabled via serde so it can be extracted from JSON responses in axum
#[derive(Deserialize)]
pub struct LoginDetails {
    username: String,
    password: String,
}

pub fn create_router(state: AppState, folder: PathBuf) -> Router {
// create a router that will host both of our new routes once we create them
    let api_router = Router::new()
           .route("/register", post(register))
           .route("/login, post(login))
           .with_state(state);

// return a router that nests our API router in an "/api" route and merges it with our static files
   Router::new()
       .nest("/api", api_router)
       .merge(SpaRouter::new("/", static_folder).index_file("index.html"))

}
As you can see, all we need to do is write the functions that we'll be using in our router and include them in the router. We can also use multiple request methods in one route by simply chaining the methods (more on this later on once we finish writing all of the routes).
// backend/src/router.rs
pub async fn register(
// this is the struct we implement and use in our router - we will need to import this from our main file by adding "use crate::AppState;" at the top of our app
    State(state): State<AppState>,
// this is the typed request body that we receive from a request - this comes from the axum::Json type
    Json(newuser): Json<LoginDetails>,
) -> impl IntoResponse {

// avoid storing plaintext passwords - when a user logs in, we will simply verify the hashed password against the request. This is safe to unwrap as this will basically never fail
     let hashed_password = bcrypt::hash(newuser.password, 10).unwrap();

    let query = sqlx::query("INSERT INTO users (username, , email, password) values ($1, $2, $3)")
// the $1/$2 denotes dynamic variables in a query which will be compiled at runtime - we can bind our own variables to them like so:
        .bind(newuser.username)
        .bind(newuser.email)
        .bind(hashed_password)
        .execute(&state.postgres);

// if the request completes successfully, return CREATED status code - if not, return BAD_REQUEST
    match query.await {
        Ok(_) => (StatusCode::CREATED, "Account created!".to_string()).into_response(),
        Err(e) => (
            StatusCode::BAD_REQUEST,
            format!("Something went wrong: {e}"),
        )
            .into_response(),
    }
}
As you can see, we hash the password, set up a query via SQLx to create a new user and then if it's successful, return a 201 Created status code - if it's not successful, return a 400 Bad Request status code to indicate that something's wrong.
Pattern matching is an extremely strong form of exhaustive error handling in Rust, and it comes in many forms: We can use if let else and let else, both of which utilise pattern matching as you will see later on.
// backend/src/router.rs
pub async fn login(
    State(mut state): State<AppState>,
    jar: PrivateCookieJar,
    Json(login): Json<LoginDetails>,
) -> Result<(PrivateCookieJar, StatusCode), StatusCode> {
    let query = sqlx::query("SELECT * FROM users WHERE username = $1")
        .bind(&login.username)
        .fetch_optional(&state.postgres);

    match query.await {
        Ok(res) => {
// if bcrypt cannot verify the hash, return early with a BAD_REQUEST error
            if bcrypt::verify(login.password, res.unwrap().get("password")).is_err() {
                return Err(StatusCode::BAD_REQUEST);
            }
// generate a random session ID and add the entry to the hashmap
                let session_id = rand::random::<u64>().to_string();

                sqlx::query("INSERT INTO sessions (session_id, user_id) VALUES ($1, $2) ON CONFLICT (user_id) DO UPDATE SET session_id = EXCLUDED.session_id")
                .bind(&session_id)
                .bind(res.get::<i32, _>("id"))
                .execute(&state.postgres)
                .await
                .expect("Couldn't insert session :(");


            let cookie = Cookie::build("foo", session_id)
                .secure(true)
                .same_site(SameSite::Strict)
                .http_only(true)
                .path("/")
                .finish();

// propogate cookies by sending the cookie as a return type along with a status code 200
            Ok((jar.add(cookie), StatusCode::OK))

        }
// if the query fails, return status code 400
        Err(_) => Err(StatusCode::BAD_REQUEST),
    }
}
As you can see, the requests simply take a JSON request body of whatever type we've decided to give it (so because we have given both a type of axum::Json for the request body, it will only accept requests with a JSON request body of "username" and "password"). Structs used in this way must implement serde::Deserialize as we need to be able to pull the data from JSON, as well as the JSON request argument itself being the final argument we pass into the route function.
You may notice we've used a struct called PrivateCookieJar in our login request. This is simply a way to be able to automatically handle HTTP cookies without having to explicitly set headers for them - to be able to propagate any changes in them however, we need to set them as a return type and return the changes. When the user wants to access a protected route, all we need to do is grab the value from the cookie jar and validate it against the session IDs we've saved in our database. Because we're using a private cookie jar, any cookies saved on the client side will be encrypted with the key we've created in our initial struct which will generate a new key each time we start our app up.
Now that we've added a route to be able to log in, let's have a look at adding a route for logging out as well as some middleware for validating a session:
// backend/src/router.rs
pub async fn logout(State(state): State<AppState>, jar: PrivateCookieJar) -> Result<PrivateCookieJar, StatusCode> {
    let Some(cookie) = jar.get("foo").map(|cookie| cookie.value().to_owned()) else {
        return Ok(jar)
    };

    let query = sqlx::query("DELETE FROM sessions WHERE session_id = $1")
        .bind(cookie)
        .execute(&state.postgres);


        match query.await {
        Ok(_) => Ok(jar.remove(Cookie::named("foo"))),
        Err(_) => Err(StatusCode::INTERNAL_SERVER_ERROR)
    }
}


pub async fn validate_session<B>(
    jar: PrivateCookieJar,
    State(state): State<AppState>,
// Request<B> and Next<B> are required types for middleware from a function in axum
    request: Request<B>,
    next: Next<B>,
) -> (PrivateCookieJar, Response) {
// attempt to get the cookie - if it can't find a cookie, return 403
    let Some(cookie) = jar.get("foo").map(|cookie| cookie.value().to_owned()) else {

        println!("Couldn't find a cookie in the jar");
        return (jar,(StatusCode::FORBIDDEN, "Forbidden!".to_string()).into_response())
    };

// attempt to find the created session
    let find_session = sqlx::query("SELECT * FROM sessions WHERE session_id = $1")
                .bind(cookie)
                .execute(&state.postgres)
                .await;

// if the created session is OK, carry on as normal and run the route - else, return 403
    match find_session {
        Ok(res) => (jar, next.run(request).await),
        Err(_) => (jar, (StatusCode::FORBIDDEN, "Forbidden!".to_string()).into_response())
    }
}
As you can see above - for the logout route we simply attempt to destroy the session and then return the cookie removal, and then for the validation route we attempt to get the session cookie and then make sure the cookie session is valid in our database.
Let's have a look at creating basic CRUD functionality for some records in our database. We'll want to make a struct that utilizes sqlx::FromRow so that we can easily pull records from our database, like so:
// src/backend/router.rs
#[derive(sqlx::FromRow, Deserialize, Serialize)]
pub struct Note {
    id: i32,
    message: String,
    owner: String,
}
Then we can simply just use sqlx::query_as while typing the variable as a vector of the struct to get what we want, like so:
// src/backend/router.rs
pub async fn view_records(State(state): State<AppState>) -> Json<Vec<Note>> {
    let notes: Vec<Note> = sqlx::query_as("SELECT * FROM notes ")
        .fetch_all(&state.postgres)
        .await.unwrap();

    Json(notes)
}
As you can see, all we need to do is simply use the query with our database connection while making sure the struct we've typed our return as has the sqlx::FromRow derive macro on it. Using what we know here, we can also quite simply make our other routes like so:
// backend/src/router.rs
#[derive(Deserialize)]
pub struct RecordRequest {
    message: String,
    owner: String
}

pub async fn create_record(
    State(state): State<AppState>,
    Json(request): Json<RecordRequest>,
) -> Response {
    let query = sqlx::query("INSERT INTO notes (message, owner) VALUES ($1, $2)")
        .bind(request.message)
        .bind(request.owner)
        .execute(&state.postgres);

    match query.await {
        Ok(_) => (StatusCode::CREATED, "Record created!".to_string()).into_response(),
        Err(err) => (
            StatusCode::BAD_REQUEST,
            format!("Unable to create record: {err}"),
        )
            .into_response(),
    }
}

// note here: the "path" is simply the id URL slug, which we will define later
pub async fn edit_record(
    State(state): State<AppState>,
    Path(id): Path<i32>,
    Json(request): Json<RecordRequest>,
) -> Response {

    let query = sqlx::query("UPDATE notes SET message = $1 WHERE id = $2 AND owner = $3")
        .bind(request.message)
        .bind(id)
        .bind(request.owner)
        .execute(&state.postgres);

    match query.await {
        Ok(_) => (StatusCode::OK, format!("Record {id} edited ")).into_response(),
        Err(err) => (
            StatusCode::BAD_REQUEST,
            format!("Unable to edit message: {err}"),
        )
            .into_response(),
    }
}

pub async fn destroy_record(State(state): State<AppState>, Path(id): Path<i32>) -> Response {
    let query = sqlx::query("DELETE FROM notes WHERE id = $1")
        .bind(id)
        .execute(&state.postgres);

    match query.await {
        Ok(_) => (StatusCode::OK, "Record deleted".to_string()).into_response(),
        Err(err) => (
            StatusCode::BAD_REQUEST,
            format!("Unable to edit message: {err}"),
        )
            .into_response(),
    }
}
Now we've created all of our basic functionality for our web app! However, we are missing one last thing before we combine all of our routes. What if a user wants to reset their password? Surely we should have a self-service route for that? Let's make that route now.
// backend/src/router.rs

pub async fn forgot_password(
    State(state): State<AppState>,
    Json(email_recipient): Json<String>,
) -> Response {
    let new_password = Alphanumeric.sample_string(&mut rand::thread_rng(), 16);

let hashed_password = bcrypt::hash(&new_password, 10).unwrap();

    sqlx::query("UPDATE users SET password = $1 WHERE email = $2")
            .bind(hashed_password)
            .bind(email_recipient)
            .execute(&state.postgres)
            .await;

    let credentials = Credentials::new(state.smtp_email, state.smtp_password);

    let message = format!("Hello!\n\n Your new password is: {new_password} \n\n Don't share this with anyone else. \n\n Kind regards, \nZest");

    let email = Message::builder()
        .from("noreply <your-gmail-address-here>".parse().unwrap())
        .to(format!("<{email_recipient}>").parse().unwrap())
        .subject("Forgot Password")
        .header(ContentType::TEXT_PLAIN)
        .body(message)
        .unwrap();

// build the SMTP relay with our credentials - in this case we'll be using gmail's SMTP because it's free
    let mailer = SmtpTransport::relay("smtp.gmail.com")
        .unwrap()
        .credentials(credentials)
        .build();

// this part x`doesn't really matter since we don't want the user to explicitly know if they've actually received an email or not for security purposes, but if we do then we can create an output based on what we return to the client
    match mailer.send(&email) {
        Ok(_) => (StatusCode::OK, "Sent".to_string()).into_response(),
        Err(e) => (StatusCode::BAD_REQUEST, format!("Error: {e}")).into_response(),
    }
}
We'll also want to use a Secrets.toml as well as Secrets.dev.toml file at the Cargo.toml level to add secrets that we'll need. We should use the following format for this:
# Secrets.toml
SMTP_EMAIL="your-email-goes-here"
SMTP_PASSWORD="your-email-password-goes-here"
DOMAIN="<your-project-name-from-shuttle-toml>.shuttleapp.rs"

# You can create a Secrets.dev.toml to use secrets in a development environment - in this case, you can set domain to "127.0.0.1" and copy the other two variables as required.
Now our all of our apps are done, we should probably have a look at creating the router out of all of our apps. We can simply nest our routing and include the middleware by appending it to our protected routes, like so:
// backend/src/router.rs
pub fn api_router(state: AppState) -> Router {
// CORS is required for our app to work
    let cors = CorsLayer::new()
        .allow_credentials(true)
        .allow_methods(vec![Method::GET, Method::POST, Method::PUT, Method::DELETE])
        .allow_headers(vec![ORIGIN, AUTHORIZATION, ACCEPT])
        .allow_origin(state.domain.parse::<HeaderValue>().unwrap());

// declare the records router
    let notes_router = Router::new()
        .route("/", get(view_records))
        .route("/create", post(create_record))
        .route(
// you can add multiple request methods to a route like this
            "/:id",       get(view_one_record).put(edit_record).delete(destroy_record),
        )
        .route_layer(middleware::from_fn_with_state(
            state.clone(),
            validate_session,
        ));

// the routes in this router should be public, so no middleware is required
    let auth_router = Router::new()
        .route("/register", post(register))
        .route("/login", post(login))
        .route("/forgot", post(forgot_password))
        .route("/logout", get(logout));

// return router that uses all routes from both individual routers, but add the CORS layer as well as AppState which is defined in our entrypoint function
    Router::new()
        .route("/health", get(health_check))
        .nest("/notes", notes_router)
        .nest("/auth", auth_router)
        .with_state(state)
        .layer(cors)
}
As you can see, we can create an API router by simply defining two routers, each with their own routes (one router with protected routes that will only run if the session is validated), and then simply returning a router that has a health check route, nests our two previous routes and then adds the CORS and app state to the router.
Our final router function can simply then look like this:
// backend/src/router.rs
pub fn create_router(static_folder: PathBuf, state: AppState) -> Router {
    let api_router = api_router(state);

// merge our static file assets
    Router::new()
        .nest("/api", api_router)
        .merge(SpaRouter::new("/", static_folder).index_file("index.html"))
}
We will use this function in our initial entry point function in our main function (in main.rs) to generate the router, like so:
#[derive(Clone)]
pub struct AppState {
    postgres: PgPool,
    key: Key,
    smtp_email: String,
    smtp_password: String,
    domain: String,
}

impl FromRef<AppState> for Key {
    fn from_ref(state: &AppState) -> Self {
        state.key.clone()
    }
}

#[shuttle_runtime::main]
async fn axum(
    #[shuttle_static_folder::StaticFolder] static_folder: PathBuf,
    #[shuttle_shared_db::Postgres] postgres: PgPool,
    #[shuttle_secrets::Secrets] secrets: SecretStore,
) -> shuttle_axum::ShuttleAxum {
    sqlx::migrate!()
        .run(&postgres)
        .await
        .expect("Something went wrong with migrating :(");

    let smtp_email = secrets
        .get("SMTP_EMAIL")
        .expect("You need to set your SMTP_EMAIL secret!");

    let smtp_password = secrets
        .get("SMTP_PASSWORD")
        .expect("You need to set your SMTP_PASSWORD secret!");

// we need to set this so we can put it in our CorsLayer
    let domain = secrets
        .get("DOMAIN")
        .expect("You need to set your DOMAIN secret!");

    let state = AppState {
        postgres,
        key: Key::generate(),
        smtp_email,
        smtp_password,
        domain,
    };

    let router = create_router(static_folder, state);

    Ok(router.into())
}
Note that for importing functions from files, you need to define them in your lib.rs file if they're in the same file directory like above (use router); this also applies to trying to import functions from one file into another file that is also not the main entrypoint file. This link explains it quite well if you need clarification.
Now we're done with the programming section! We can finally look at deploying.
Deployment
Deploying with shuttle, thankfully, is quite easy - you just need to run npm run deploy in the root directory of your project and if there aren't any issues, you should be able to see that shuttle has launched your app and it will return a list of information about your deployment followed by the database connection string for your shuttle-provisioned database. If you need to find this database string again, you can run cargo shuttle status in the backend directory of your project and it will find it for you.
You may wish to run cargo fmt and cargo clippy before you deploy as any warnings or errors will appear while your web service is being built. If you don't have either of these components, you can use rustup component add rustfmt and rustup component add clippy respectively - both of these tools are a great addition to any Rust developer's toolbox and I would highly recommend using both of them.
Finishing Up
Thank you for reading my article! I hope this has given you some insight into how building a Rust webservice can be made easily and without hassle. Rust has evolved significantly in the past couple of years, making it much more approachable for new learners. If you've been hesitant to try it out, now is a great time to give it a go and see for yourself how powerful and user-friendly Rust can be.
